Show an outfit instead of explaining it
A picture can show the shape of a jacket, the length of the hair and a mix of colors at once. Use a clear view of the features you want in the skin.
Use a photo or drawing to guide your Minecraft skin. Choose the hair, clothes and colors you want to keep, and add a short note for anything the image does not show.
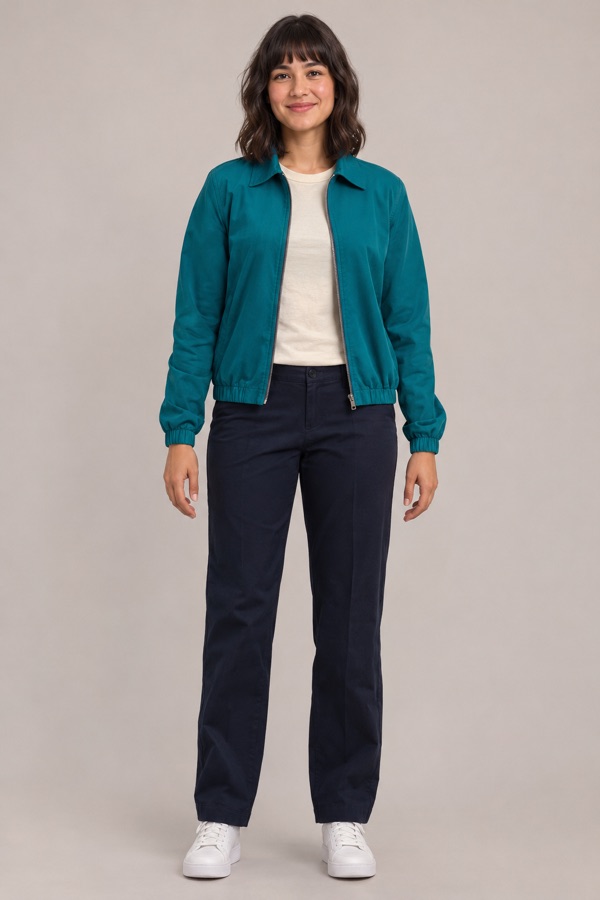 Photo-style reference
Choose a PNG or JPG up to 8 MB. Add the hair, outfit or colors you want to keep. Generation requires sign-in and credits.
Photo-style referenceThis image to Minecraft skin tool uses visible details in a selfie, outfit photo or drawing to guide a new 64×64 skin. The picture is a reference for the character’s look; it is not simply resized into a skin file.
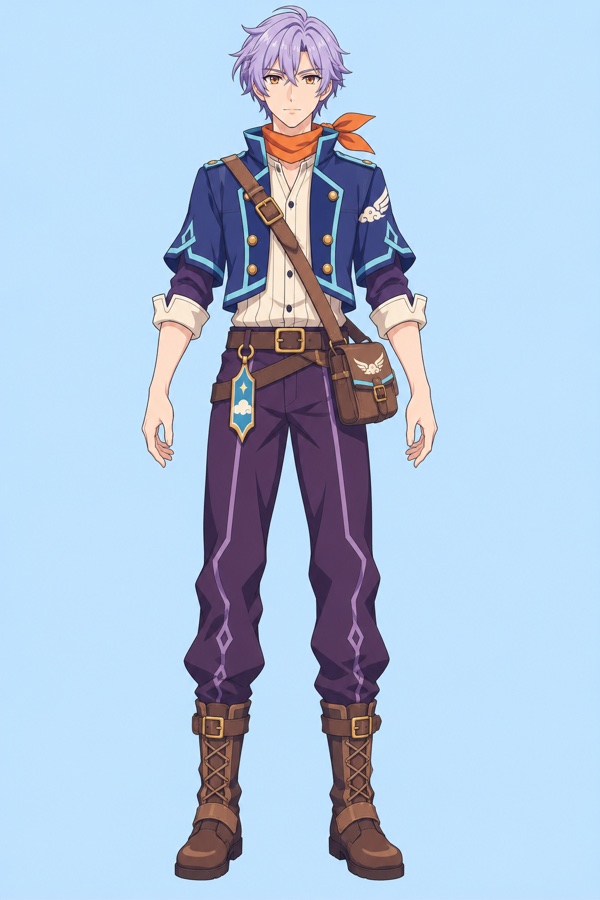 Original anime reference
A picture can show the shape of a jacket, the length of the hair and a mix of colors at once. Use a clear view of the features you want in the skin.
Tell the tool which parts to use as a guide and which to change. For example: “Keep the dark hair and blue coat. Use white shoes.” The image and your note work together as references.
Use the original picture to spot a missing color or clothing detail. If the skin is close to the look you want, the editor lets you paint that area by hand.
A picture can show the clothes and colors at once. Text is useful for a new idea or details outside the frame. An existing skin PNG belongs in the editor.
| Method | Best for | You provide | You get | Cost and account |
|---|---|---|---|---|
| Image to skin | A look shown in a photo or drawing | PNG or JPG reference and an optional note | 64×64 skin PNG | 10 credits per generation; sign-in required |
| Text to skin | A character you can describe | An outfit, hair and main colors | 64×64 skin PNG | 10 credits per generation; sign-in required |
| Pixel editor | A small change to an existing skin | 64×64 skin PNG and brush strokes | Edited 64×64 PNG | Free; no account needed |
Image generation uses the picture as a guide and does not promise an exact likeness. Uploading a picture alone does not start a paid generation. View credit packs · Read the import guide
Use your hair and visible clothing as a starting point. Expect a simple pixel character, not an exact copy of your face.
Bring the colors of a favorite jacket, shirt or pair of shoes into your character. Use a picture that shows those items clearly.
Start with a drawing you own or have permission to use. Point out the features that make the character easy to recognize.
Choose the picture based on what you want to show. A face photo can guide the hair, while a full outfit photo gives more information about the coat, trousers and shoes.
Crop out other people and busy backgrounds. Use an outfit photo when the clothes matter more than the face.
Try: “Keep the green jacket and white hair. Use dark boots.” Describe the back too if its color or design matters.
Use a PNG or JPG up to 8 MB and no more than 4096 pixels on either side. Only upload images you own or may use.
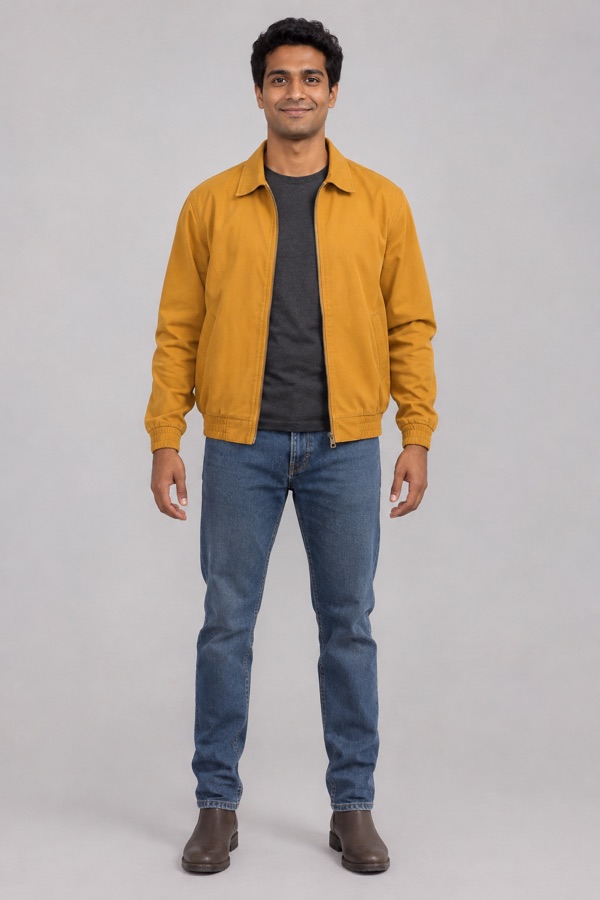 Photo-style reference
Look at the original and the skin together. Compare the main hair color, coat shape and clothing colors first. Then turn the skin to see how the back and hidden parts were filled in.
Edit a skinBrowse all 12 skins, including photo and character art comparisons.
AI-made reference photo and the skin generated from it with MC Skin Maker. Classic arms.
Input: View AI-made reference photo
Prompt: Keep the person’s hair, jacket, shirt, trousers and shoe colors from the reference photo. Use the same outfit on the back.
Output: 64×64 PNG skin texture. The full-body preview above is rendered from this file.
 Download 64×64 PNGEdit this skin →Try this image and prompt →
Studio sample skin for exploring the texture and 3D preview. Not a player submission.
Output: 64×64 PNG skin texture. The full-body preview above is rendered from this file.
 Download 64×64 PNGEdit this skin →
Original AI-made character art and the skin generated from it. Classic arms.
Input: View original character art
Prompt: Keep the person’s hair, jacket, shirt, trousers and shoe colors from the reference photo. Use the same outfit on the back.
Output: 64×64 PNG skin texture. The full-body preview above is rendered from this file.
 Download 64×64 PNGEdit this skin →Try this image and prompt →
AI-made reference photo and its generated skin. Classic arms.
Input: View AI-made reference photo
Prompt: Keep the person’s hair, jacket, shirt, trousers and shoe colors from the reference photo. Use the same outfit on the back.
Output: 64×64 PNG skin texture. The full-body preview above is rendered from this file.
 Download 64×64 PNGEdit this skin →Try this image and prompt →
Studio sample skin with a cream suit and gold visor. Not a player submission.
Output: 64×64 PNG skin texture. The full-body preview above is rendered from this file.
 Download 64×64 PNGEdit this skin →
Studio sample skin for checking armor colors and pixel details. Not a player submission.
Output: 64×64 PNG skin texture. The full-body preview above is rendered from this file.
 Download 64×64 PNGEdit this skin →
Studio sample skin. A dark outfit with a bright pumpkin design.
Output: 64×64 PNG skin texture. The full-body preview above is rendered from this file.
 Download 64×64 PNGEdit this skin →
Studio sample skin. A bright blue shirt with short sleeves.
Output: 64×64 PNG skin texture. The full-body preview above is rendered from this file.
 Download 64×64 PNGEdit this skin →
Studio sample skin. Brown travel clothes with a shoulder strap.
Output: 64×64 PNG skin texture. The full-body preview above is rendered from this file.
 Download 64×64 PNGEdit this skin →
Studio sample skin. A red coat with white trim and a dark belt.
Output: 64×64 PNG skin texture. The full-body preview above is rendered from this file.
 Download 64×64 PNGEdit this skin →
Studio sample skin. A green jacket with dark trousers.
Output: 64×64 PNG skin texture. The full-body preview above is rendered from this file.
 Download 64×64 PNGEdit this skin →
Studio sample skin. Green outdoor clothes and dark boots.
Output: 64×64 PNG skin texture. The full-body preview above is rendered from this file.
 Download 64×64 PNGEdit this skin →
Upload a PNG or JPG up to 8 MB. Use one clear subject with the hair or clothing you want the skin to follow.
Add a short note about what to keep, what to change and any hidden parts. Choose Classic or Slim, then sign in and use credits to generate.
Compare the skin with your reference. Paint any small fixes in the editor, then download the PNG with the arm model you selected.
Photo-style referenceAdd a note when important parts are outside the frame or hidden. If a portrait cuts off the legs, describe the trousers and shoes. If the back is not visible, say whether it should be plain or use the same colors as the front.
Also use text to request a change: “Keep the brown hair and green jacket, but use black trousers and white shoes.” Name the few details that matter most, then compare the result with your request.
Original anime referenceA skin has only 64×64 pixels to cover every side of the character. Large color areas and simple clothing shapes have more room than small text, jewelry or fine facial features.
The tool also has to fill in areas the photo does not show. A clear front view cannot tell it exactly what is on the back. Treat the result as a pixel version of the look, with no promise of an exact likeness.
Upload a PNG or JPG reference, then add a short note about the hair, clothes and colors you want to keep. Choose Classic or Slim arms and generate with your account and credits. Compare the skin with your picture before downloading the 64×64 PNG.
You can use your own photo to guide the hair, outfit and colors. Choose a clear picture with one person and describe important parts that are outside the frame, such as shoes. The result is a simple pixel character, so it will not keep every facial detail or guarantee an exact likeness.
Yes, AI generation requires sign-in and credits. Choosing a photo does not start generation or spend credits. The cost appears next to the generation button.
Use a selfie, outfit photo or character drawing you own or have permission to use. Upload a PNG or JPG up to 8 MB, with neither side larger than 4096 pixels.
The download uses the standard 64×64 skin layout. Java supports custom skins. Bedrock import options depend on the device; some consoles do not allow custom PNG uploads.
No exact match is promised. The tool uses the photo as a reference and simplifies it into a pixel character. Check the result and edit details if needed.
Yes. Open the result in the skin editor, change pixels and save a new PNG. The editor currently shows a classic-arm preview.
Credits are returned once a job is confirmed as failed. If its status is unclear, it stays under review until the result can be checked.
No. The reference is sent to the generation provider when you generate a skin. Only upload images you are comfortable sharing for this purpose.
Choose a clear photo or drawing, then name the two or three features that matter most.